How to Make an Art Quilt From a Photo
My name is Leni Levenson Wiener; I am a BERNINA Ambassador and author of several books—and all-time known for making art quilts from photos. Why from photos? I can't draw! And so if I can see it, I can capture it with my camera and create information technology. I don't need to figure out all the perspective, proportion or the light source. Today I am going to innovate you to my technique. You tin can find more than detailed information (including a workshop in a book) in my most contempo book Pictorial Fine art Quilt Guidebook.
Creating an fine art quilt fabric collage from a photograph is non difficult. For this tutorial, I will exist using a very simple example so y'all learn the basics. These basics do not change even when the photo is much more complex—just break up the photo into manageable pieces and treat each one in the same way.
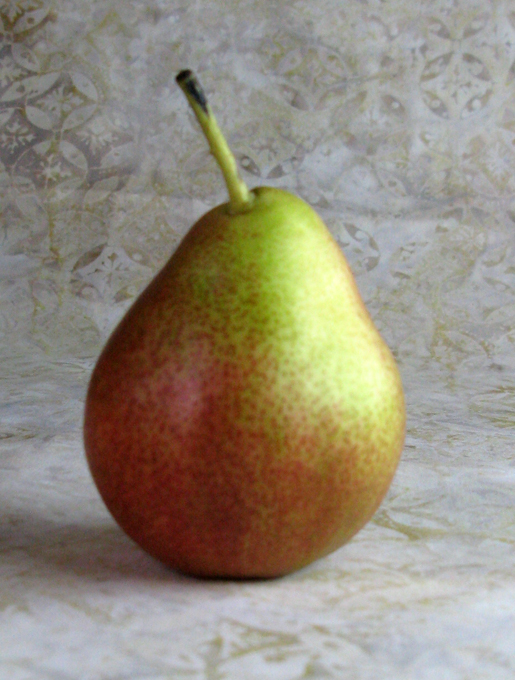
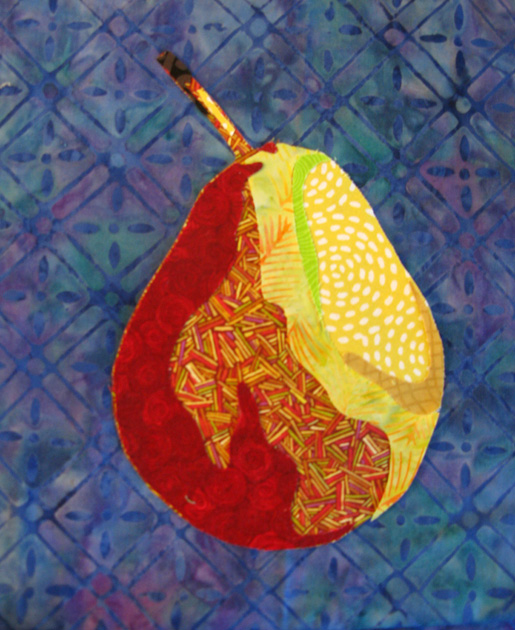
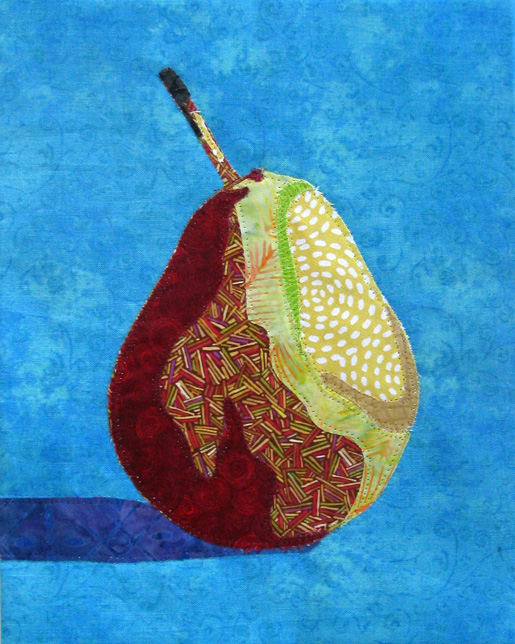
I always start with a photo. I take lots of photos that I relieve in computer files by type (landscapes, seascapes, animals, people, etc). For this project, I have chosen to use a photo of a single pear. I love their color and shape (and think they are succulent with almond butter, but that is another story for another time!).
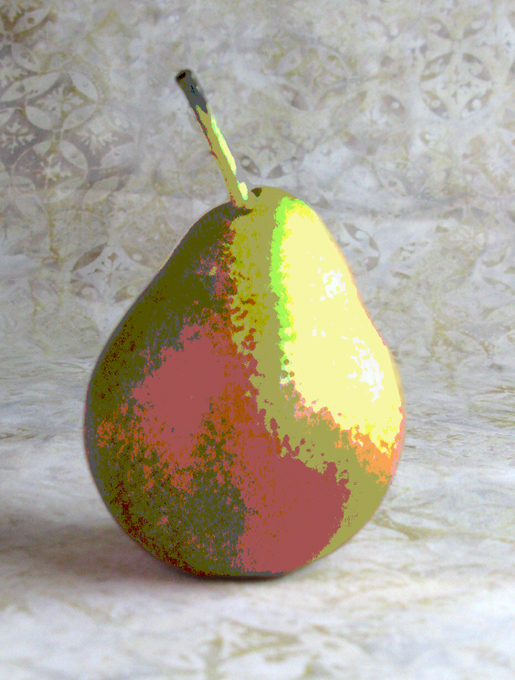
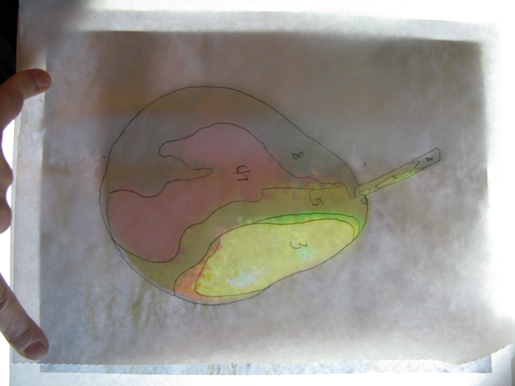
The kickoff thing I practise is simplify the photo using a computer program—either Photoshop (or Photoshop Elements using the cutout filter) or a free downloadable program called Gimp (using the color to posterize function). Both programs will permit you to reduce the number of visible colors in the photo to testify articulate color distinctions which are like shooting fish in a barrel to follow every bit your pattern—and allow you to control the level of particular in your art quilt. In this case, I used Gimp (at posterize level five) to create this uncomplicated pattern (if yous are intimidated by the calculator part, I take a pattern service on my website www.leniwiener.com). I print this blueprint in the size of my finished artwork—in this case, sized to fit on a unmarried piece of newspaper.
I thing to continue in mind is that these programs can sometimes alter the color a bit, and then I nonetheless refer to the original photograph for my color choices. What I use the pattern for is value. Value refers to the relative light/medium/dark of each color to the others, and gives the illusion of depth and dimension. Think black and white photo, and you will accept a good understanding of values.
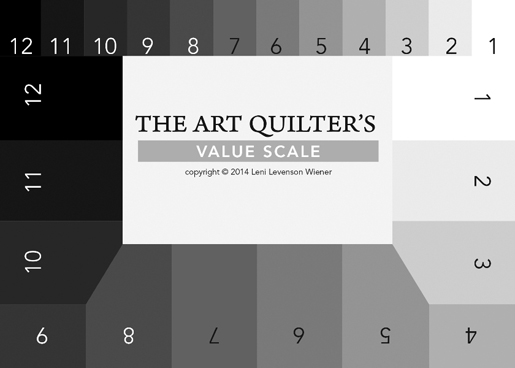
Many art quilters will print their photo in black and white in lodge to encounter value changes, but that can be problematic when two unlike colors are the same value—they await alike in the blackness and white photograph and tin oft blend together. And then instead, I have developed a gray scale value card that helps me make up one's mind what the value is in the photo and so I find a material in the same value. Keep in mind that the gray scale value card (laminated cards are available from my website) is merely a selection of gray values, there is nothing magical nearly any of the numbers I utilize.
Permit'southward start with the lighter red area in the pattern. Property the gray scale value menu next to that area of the photo, I can see the gray value that is closest is somewhere between a #half-dozen and a #7 (this is an fine art, not a science).
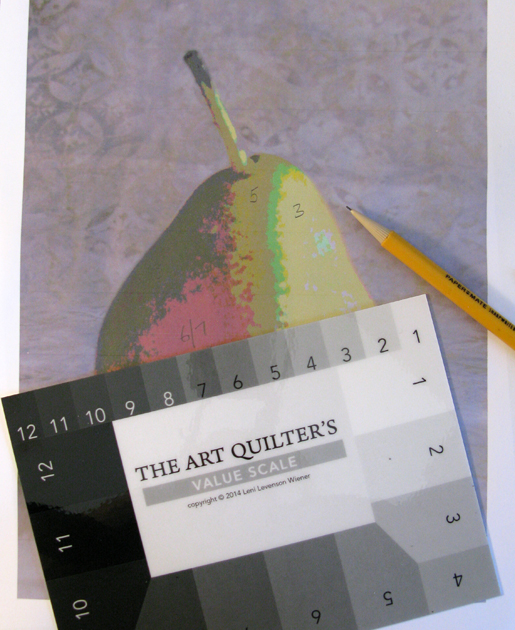
I write that number onto that area on the pattern and go to my fabrics to await for a fabric the colour I desire that is also a # 6 or #vii value. I do that for all the values/colors in the pattern.
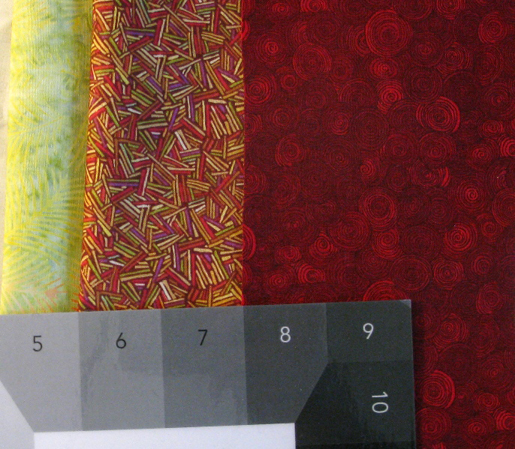
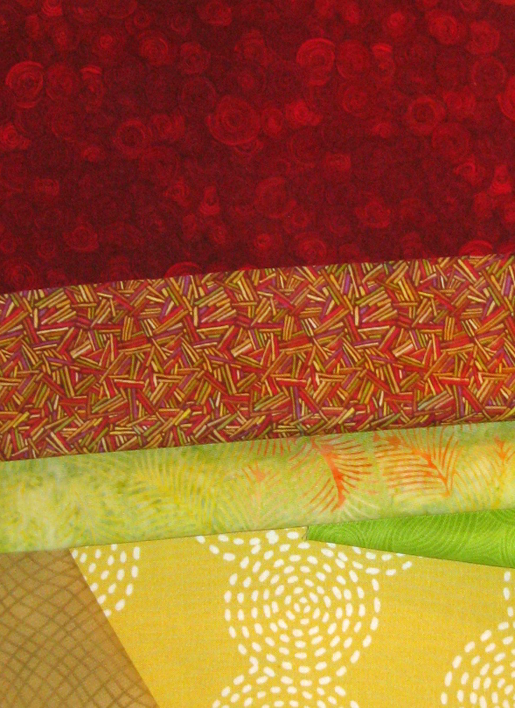
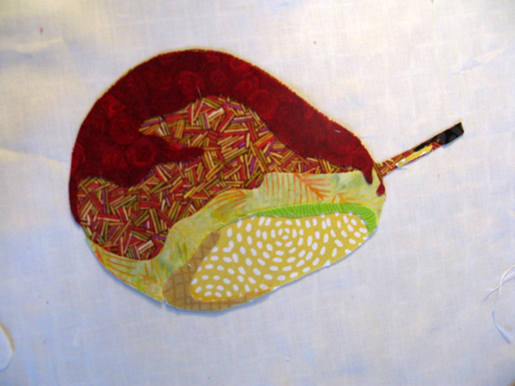
I have identified the darker red area every bit an #8, the next red surface area somewhere between a #6 and #vii, the outset dark-green area as a #5 and the lighter surface area as a #3. Those two little color changes around the lightest surface area—one looks green and the other sort of pink–can either exist included or just composite into the #five piece. I remember they are interesting so I will use them. They look to be around a #4 or #five besides just in different colors. Have fun with color and blueprint—the more unexpected the pattern, the more interesting your finished artwork will be. Only wait at the fabrics I accept chosen—very united nations "pear-like" aren't they? The layering of pattern and color makes the finished product so much more exciting than translating it directly.
Now that I take called my fabrics, I can begin amalgam my pear. I will start with the largest area of color, in this case the #6/7 red, and cut the entire pear out of that fabric. This will allow me to apply it equally a foundation and layer the rest of the fabrics on top of it, insuring that zippo slips around while I stitch. It also means the finished pear volition be self-independent, which makes it easy to audience on different backgrounds.
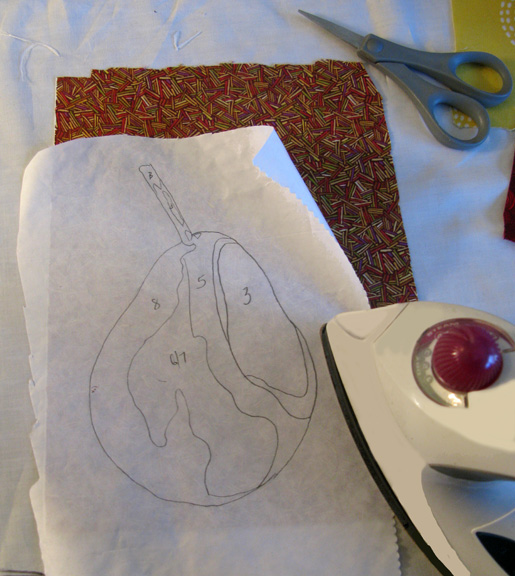
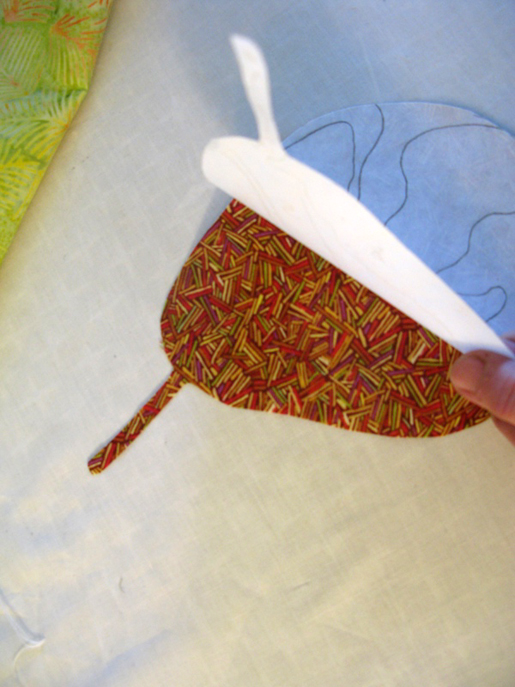
I start with freezer paper. I love freezer paper—information technology has a glossy side and a dull side. Using a lightbox or window, I place the freezer paper on pinnacle of the pattern dull side up and trace around the main shape with a mechanical pencil.
Don't worry near all the trivial giggy-gaggy lines the pattern creates, simply smooth those lines into something like shooting fish in a barrel to cutting out.
When I place this freezer newspaper drawing on meridian of the correct side of my cloth and press for a few seconds with a warm iron, the glossy side will stick to the fabric.
At present I can easily cut around the drawn shape and fabric together, and when I pull the fabric away from the paper—I have my foundation.

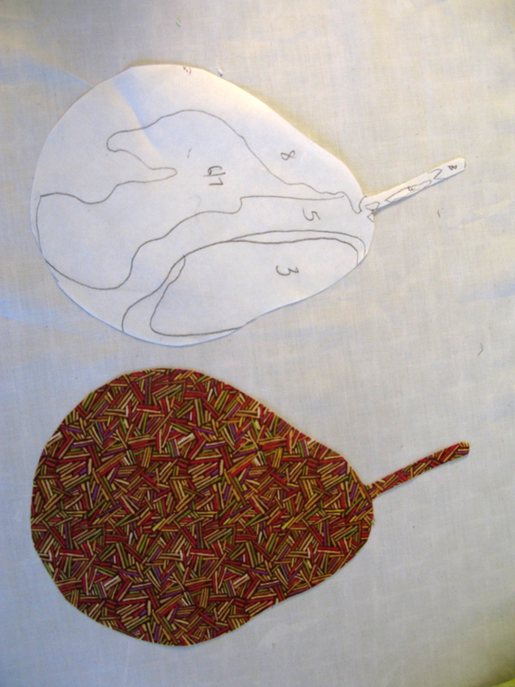
I echo the process now for the #8 piece, using the same piece of freezer paper. Once I take cut away the #8 piece, the remaining freezer paper pattern helps me line up the placement on my foundation.
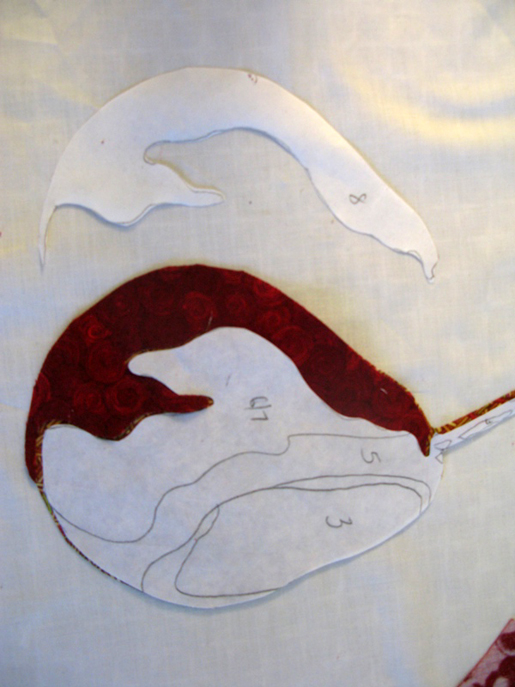
It is already starting to look like a pear!

I continue along for the rest of the shapes, using the same slice of freezer newspaper when I tin can and layering them on top of the foundation until I am done.
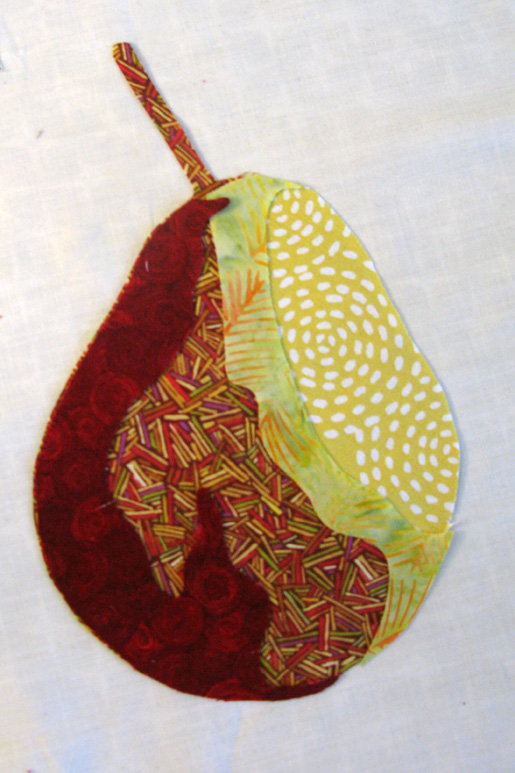
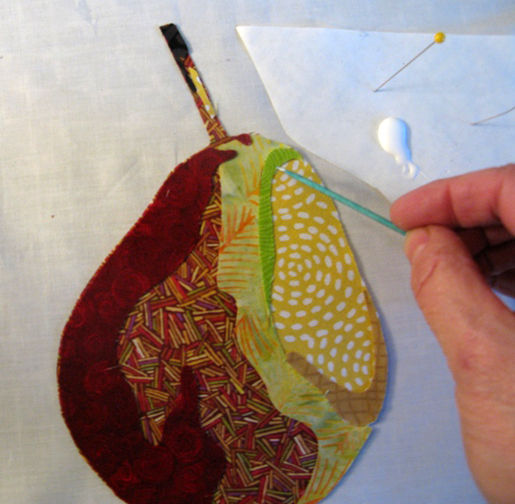
Retrieve those last 2 pieces along the edges of the #3 area? They are optional, but I decided to put them in.
At present I tin can wait at information technology and evaluate. Anything I don't like I can change. Once satisfied, I utilise a toothpick to place tiny dabs of fabric glue under the pieces to hold them in place.
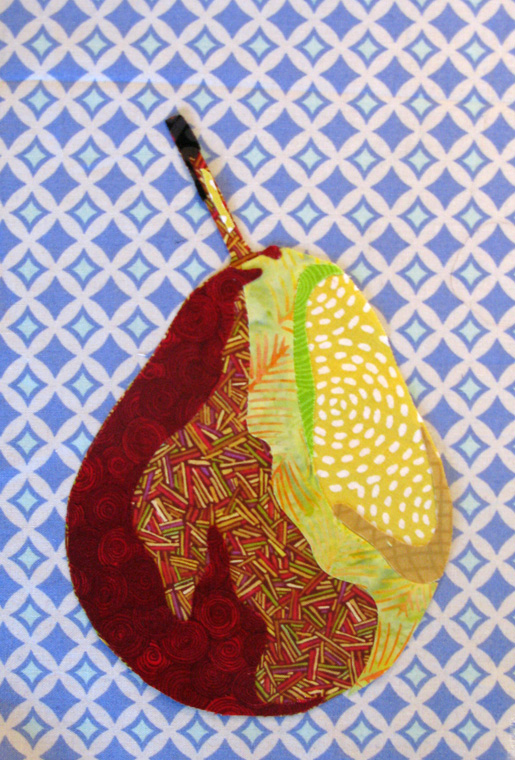
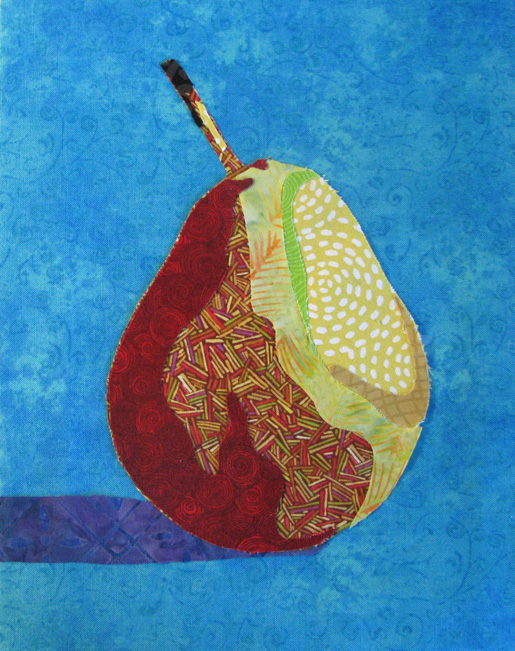
Now my pear is a single unit. If I were working with a more complex photo, I might take lots of these individual units that would eventually be put together to reinterpret the photograph. I tin can audition the pear on different backgrounds to determine what I like. Hither are some fabrics I considered:
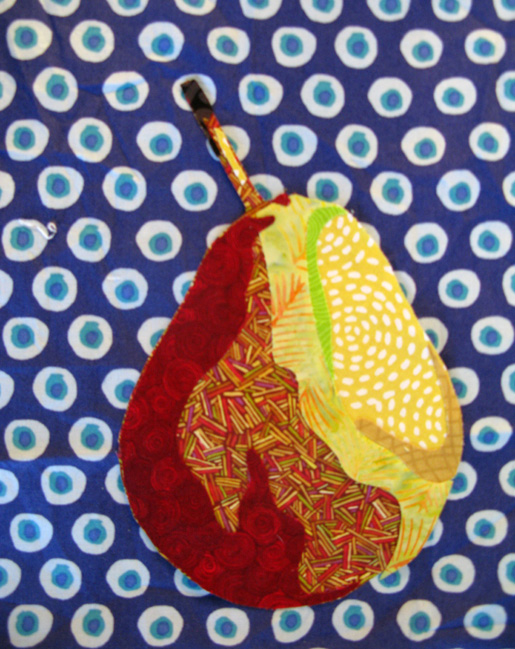
I take decided to use a nice turquoise fabric. Don't forget that little shadow, it "grounds" the pear to the background. Place the pear and shadow on the background and glue in place.
You take the pick of using batting and a cotton backing or no batting and a more than substantial backing fabric—I like to employ cotton fiber canvas (likewise called cotton duck) and no batting (always press the cotton canvas with a hot iron before you use it—it shrinks).
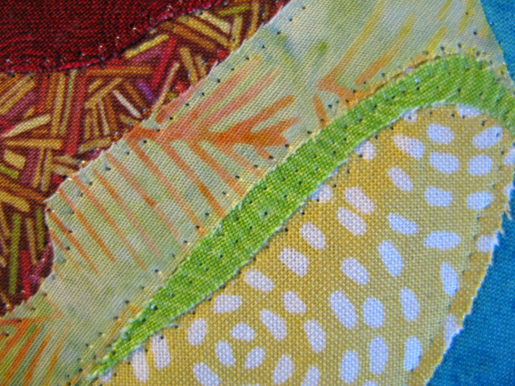
The functional sewing is side by side. I use either a straight stitch (when I want the edges to fray and take a little texture) or a zigzag when I want to encase the raw edges. Hither I am using a zigzag with a clear mono-filament thread and costless-motility stitching. Don't worry if you are new to complimentary-motion, the thread disappears, and no one will ever see your mistakes (and of course, if you have the BERNINA Run up Regulator, all your free-move stitching is perfect anyway).
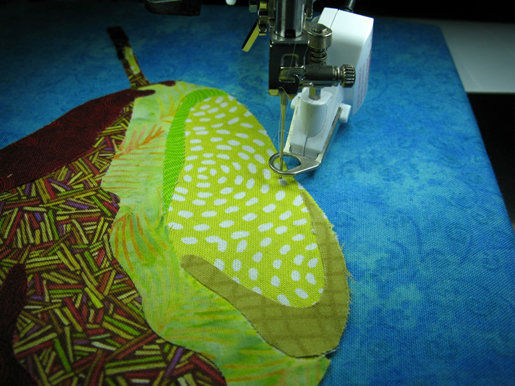
Drop your feed-dogs and utilize the BERNINA Sew Regulator or a darning pes to run up around all the raw edges. Here is a tip: for most fabric colors, the clear mono-filament thread works great, just for very dark colors information technology will leave a reflection, so for those areas, utilise fume mono-filament. I never use mono-filament in the bobbin—your preferred bobbin thread in a neutral color volition requite the mono-filament something to "grab onto" for a better run up.
The functional stitching is done, and the fine art quilt is ready for quilt stitching if you wish; stop the edges and yous accept a fabric collage from a photo.
robertshistoodespil.blogspot.com
Source: https://weallsew.com/create-a-fabric-collage-art-quilt-from-a-photo/
0 Response to "How to Make an Art Quilt From a Photo"
Post a Comment